Instructions for Qualtrics Account Transition
Exporting and Uploading Qualtrics Surveys and Data
The University of Illinois is eliminating all of its individual college/unit Qualtrics licenses (ex. LAS, ACES, etc.) and transitioning to a single campus Qualtrics license (illinois.qualtrics.com).
As a result, all college/unit accounts will be discontinued requiring holders of such accounts to download their survey instruments and data to maintain access to them. Individuals and/or units who wish for some or all of their surveys and/or survey data to remain live in Qualtrics going forward can upload copies of them to new campus license accounts if desired.
Below are the steps you can take to both keep a local copy of your Qualtrics survey and data and upload the copied surveys and data to your new campus license account. Note: These steps will need to be repeated for every survey that you want to download and copy to the new account. If all you need is a local copy of the data (and not the programmed survey instrument), skip directly to the instructions for how to EXPORT YOUR SURVEY DATA.
- Log into your college/unit Qualtrics account (LAS url example)
- Download a QSF (Qualtrics survey format) file to a secure location.
- A QSF file can be easily re-uploaded to your new Qualtrics account while keeping all your original formatting and survey flow. Keep in mind that a QSF contains only the survey, not the data. For more details on this process see the Qualtrics website.
- Please note, survey workflows cannot be carried over as part of this process as the campus account is part of a different brand.
- Open the survey that you want to copy by clicking on the name on the left hand side of the screen.
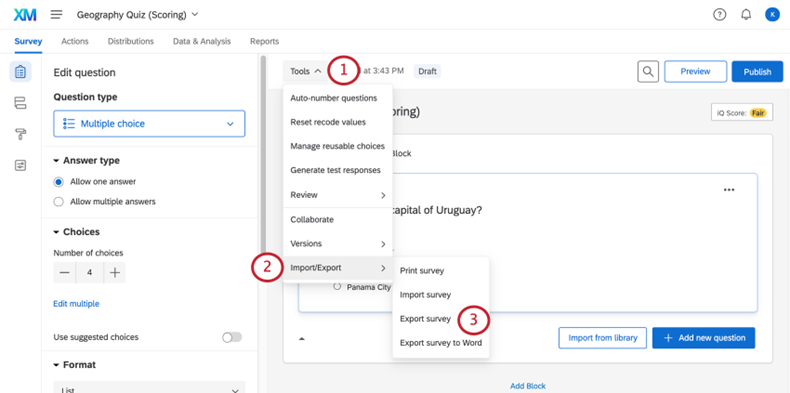
On the Qualtrics Survey tab, you will need to first click on Tools, then select Import/Export, and then choose Export survey. This will automatically download the QSF file.
- To ensure the integrity of your QSF file, do not attempt to edit it.
- It is strongly recommended that you complete or pause your data collection before August 1, 2023. In order to copy a survey to the new account without potentially losing new data it first must be closed. For more details see the Qualtrics website.
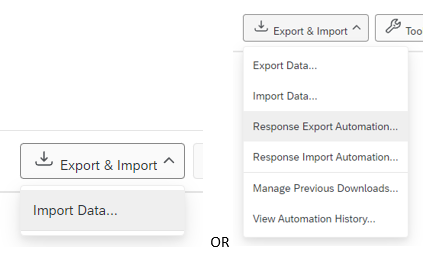
- In your college/unit Qualtrics account navigate to the survey that contains the data. Go to the Data section of the Data & Analysis tab.
- Click Export & Import and then select Export Data.
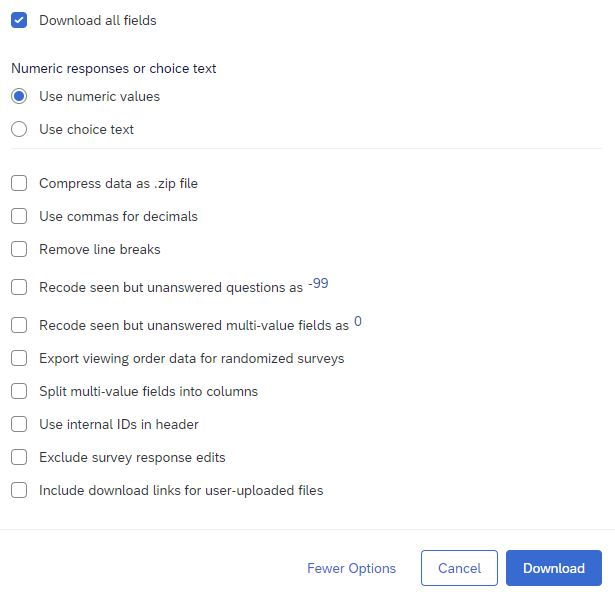
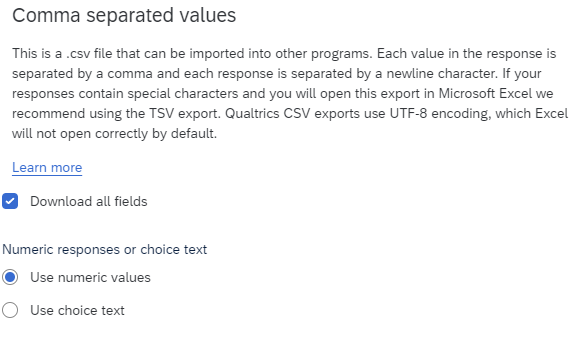
It is recommended that you check the download all fields option so that the data that you export will include all columns in the survey. You can decide what data to use for your analyses later.

- Specify a CSV formatted file if you want to upload the data into your new Qualtrics account.
It is also recommended that you download the dataset in all potential formats (e.g., CSV, SPSS, XLSX etc.) that you might use for analyses later – better safe than sorry.

Note: If you have previously defined the numeric value of each response category, then you can select Use numeric values when exporting the data to CSV. If you have not previously defined numeric values for response categories, we recommend at least keeping a copy of the exported data while selecting Use choice text. Then you can recode the categories to numeric values later. Qualtrics sometimes assigns numeric values in unpredictable and confusing ways.
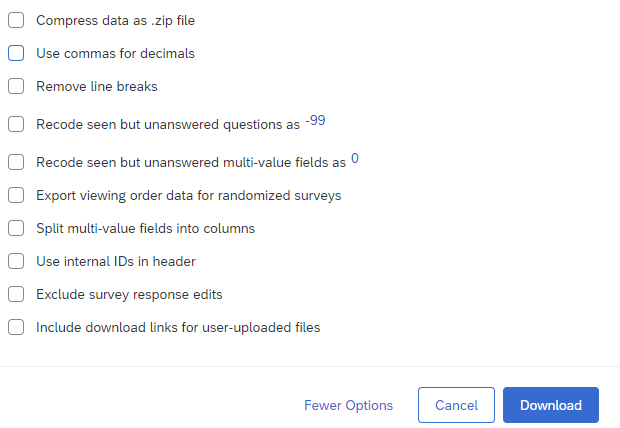
Click on More Options to look at other export options for each type of export file you can create to see how your data is being exported. You will want to ensure that future data from the new account is exported identically. Ex. For exporting CSVs the following options are available:
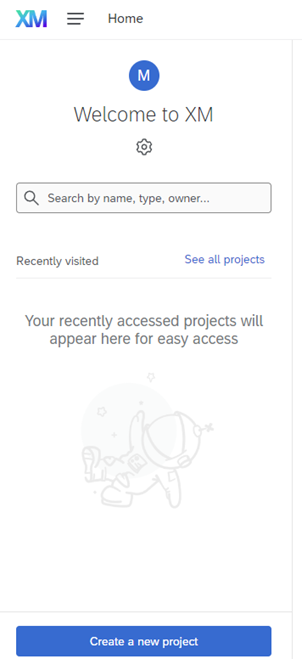
When you first login to your new campus Qualtrics account (illinois.qualtrics.com), you will be asked to Create a new project into which you upload your survey instrument and data. You will only see this page until you have created your first project/survey.
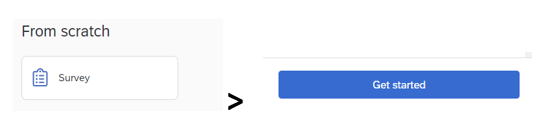
Once you’ve created your first project you will see slightly different options. To upload a second survey, navigate to the project page and create a new project From scratch, then in the bottom right-hand side of the screen click on Get started.
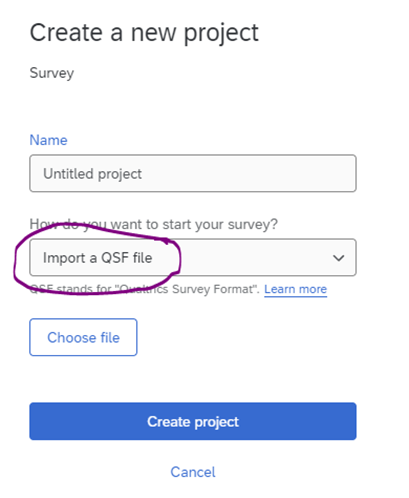
On the Create a new project page, title your survey, and then from the How do you want to start your survey? menu choose Import a QSF file, upload the QSF file you downloaded when exporting your survey instrument from the old account, and then click Create project.
- You should now see the survey instrument that you copied over from the college/unit account.
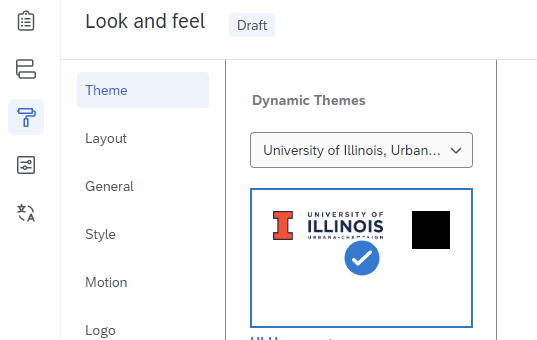
This process does not copy over survey themes/formatting/etc. Check formatting in the Look and feel tab to ensure the survey looks as intended. You may need to upload new headers, images, etc. to match your intended survey appearance.
- Check that all questions, survey flow, etc. appear to have imported correctly.
- Please note, workflows (e.g. email triggers etc.), cannot be copied over and will need to be re-created in the campus account (Qualtrics documentation).
- When you are sure your survey instrument looks correct, move on to importing survey data.
Navigate to the survey you wish to import data for and then select the Data & Analysis tab. On the Export & Import menu choose Import Data.
- Note 1: Qualtrics may say your data is being indexed or that no responses exist. Until you upload data this behavior is expected.
- Note 2: If your data file is over 100 MB you may need to split it into multiple smaller files before uploading. Please make sure that every file contains all of the same necessary header lines.)
- In the Upload response data window, choose and upload the CSV file that you exported previously.
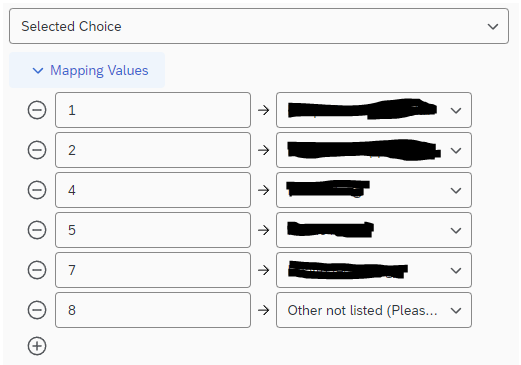
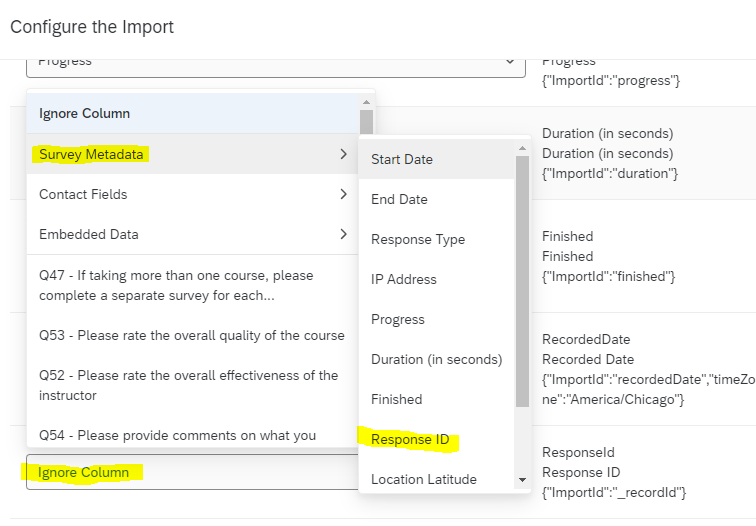
In the Configure the Import window go through all of your data fields to make sure that they are importing correctly. Check for “Ignore Column” values and “Mapping Values”. In particular, click on the Mapping Values arrow to open the list and check to make sure that all of the values map correctly to the value that should appear.
If you wish to keep your original response IDs you must change the Ignore Column default setting and select Survey Metadata and Response ID.
- When you are satisfied with your configurations, click Import Responses. You should get a popup window saying that the data imported correctly including the number of responses uploaded. A quick way to see if you have imported all of your data is to look at the number of records uploaded and the number of records in the CSV file. They should match. Then refresh the window to see your data in the Data Table.
- Please note, Qualtrics has changed the Results view from the "Results-reporting" interface to a new “Results-dashboard” interface. This interface has deprecated a number of visualizations that were present in the “Results-reporting” interface, so while your results and reports should have copied over, some visualizations may no longer work.
- In particular, you may see the message that “An unexpected error has occurred.” on certain widgets. Attempting to resolve this or add additional widgets to the default report page may result in a warning to "Please enable editing and configure widget” even if you’re in editing mode.
 >
> 
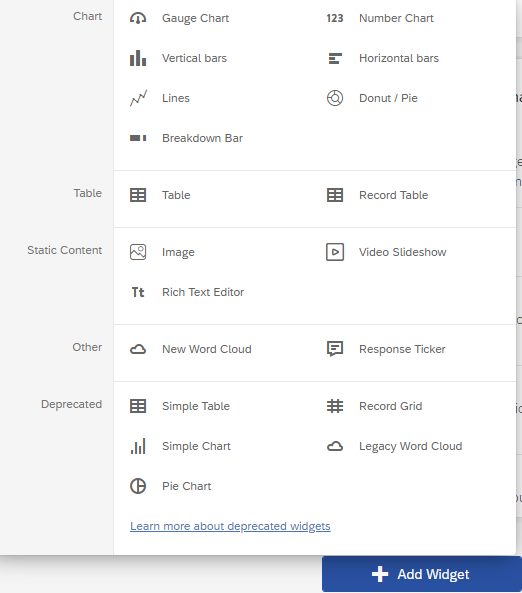
- These widgets have been deprecated and you will need to create a new Report page and select a non-deprecated widget for the results to appear. See more information on deprecated widgets.
Scroll down to the bottom of the new Report page to +Add widget and select a widget that has not been deprecated. Please note, not all types of data work with all types of widgets.
- Please note, Response IDs might change after importing the data to the new account. and the “RecordedDate” field for all uploaded data will indicate the time of the upload rather than the time that the survey respondent answered the survey. The StartDate and EndDate fields will remain unaffected.
- If you set up the data export options in your college/unit account a long time ago, make sure you compare the export options between the original and copied versions of the survey to ensure that the new data exports are consistent with the data exports you expect for the type of data file you are exporting. Example: For CSV files, these options are available: