 Pope Tech Canvas Guide Series:
Working with Headings
By Marc Thompson
Where are you heading? It's a question we often ask ourselves, especially when we're trying to figure out where we're going. It's also a question that's especially important for students trying to understand and navigate their Canvas course content. And that's precisely why this month's Accessibility Tip of the Month focuses on using headings to organize content in Canvas and provide navigational support for all learners. Along the way, we’ll explain how to use Pope Tech's accessibility tool, the Canvas Accessibility Guide, to help you check if your headings have been correctly applied.
What Are Headings?
If you've ever created a topic outline, you already understand how headings work. There are six heading levels, with Heading 1 always serving as the page title. When you create a new page in Canvas, whatever you name the page is automatically formatted as a Heading 1. Heading 2 is used for main topics on the page, Heading 3 for subtopics, and so on.
As you build the rest of your page, you can format the main sections and subsections of your content by using the font format dropdown in the Canvas rich content editor (see Figure 1). Simply select the text you want to be a heading and choose the appropriate heading level. Once a heading level is applied, you can change its font size or color without affecting the heading's structure. You're not bound by the default heading sizes or colors.
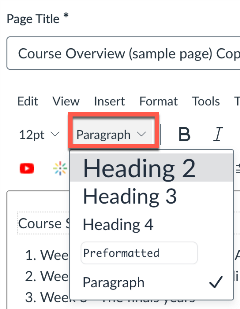 Figure 1: Canvas Editor Font Formatting Options
Headings and Accessibility
Beyond simply organizing content, headings are a powerful navigation tool for all users. Think of them as signposts for your students. For someone using a screen reader, headings act as a kind of table of contents for the page, allowing the user to jump from one heading to the next with a single keystroke. Without headings, a screen reader user would have to listen to the entire page, word for word, to locate the information they need.
Whereas most sighted users quickly skim a page, looking at the size of the text and the spatial relationships as visual clues, screen reader users will quickly "skim" the heading structure to get a sense of the content and how it's organized. In fact, according to WebAIM’s 2024 screen reader user survey, shows that 71.6% of the 1,511 respondents use headings to navigate pages (see WebAIM's Screen Reader User Survey). To give you an idea of what screen readers see when they look at headings, Figure 2 shows a list headings a screen reader user might pull up in JAWS, a popular Windows-based screen reader. The number to the right of the headings in the list indicates the heading level. Note also the "Move to Heading" button used to facilitate navigation. Put plainly, organizing content with headings makes it easier for everyone to find what they're looking for by breaking up long blocks of text into manageable chunks. When headings are correctly applied, both sighted users and screen reader users can quickly see the relationships between different sections of content and more easily locate the information they need.
 Figure 2: JAWS Heading List
Using the Pope Tech Canvas Guide to Fix Heading Issues
Now that you understand how headings provide clear structure for your content, you can use the Pope Tech Accessibility Guide to check if headings have been properly applied to your page content. When you click the Pope Tech Accessibility Guide button next to the Save and Cancel buttons at the bottom of the Canvas editor (see Figure 3), the Guide will scan your page and report any accessibility issues it finds. If there are issues with your headings, they will be flagged.
 Figure 3: Pope Tech Canvas Accessibility Guide Button
Top 3 Heading Issues and How to Fix Them
We'll focus on the three main heading issues reported by the Pope Tech Accessibility Guide and how to fix them.
In short, using the Pope Tech Accessibility Guide can help you quickly and efficiently ensure that your Canvas page content is well-structured and accessible to all students. Regularly checking your pages with the Pope Tech tool and fixing any heading issues not only improves accessibility but also helps organize your content and make it easier to read and navigate for everyone.
So, where are your students heading? With a little effort and guidance from the Pope Tech tool, you can make sure they’re always on the right path.
Tune in next month when we explore color contrast in Canvas and how to use the Pope Tech Guide to identify and fix contrast issues making your content more accessible to all learners, especially those with low vision or color blindness.